This session was the first in the event series dedicated to collaborative journey mapping, where UXPressia experts share best practices, tips, and collaborative customer journey mapping examples.
At a recent event, we discussed the challenges of collaborative journey mapping and shared our approach to planning such an initiative. Below are the key ideas and examples of how to bring them to life in the UXPressia tool.
Contents
- 1 Journey mapping collaboration basics: top challenges
- 2 The importance of being strategic
- 3 4 stages of journey mapping initiatives
- 4 3 types of journey mapping initiatives
- 5 Mapping lenses
- 6 Who to involve in the collaboration?
- 7 Setting the expectations
- 8 Collaboration timeline
- 9 The importance of facilitation: who should play this role
- 10 To sum up
- 11 Bonus: Journey mapping collaboration basics's recording
- 12 What’s next?
Journey mapping collaboration basics: top challenges
Before this event, we talked to some of our clients and asked them what parts of collaboration they found most challenging when working on a customer journey map. Below are the results:
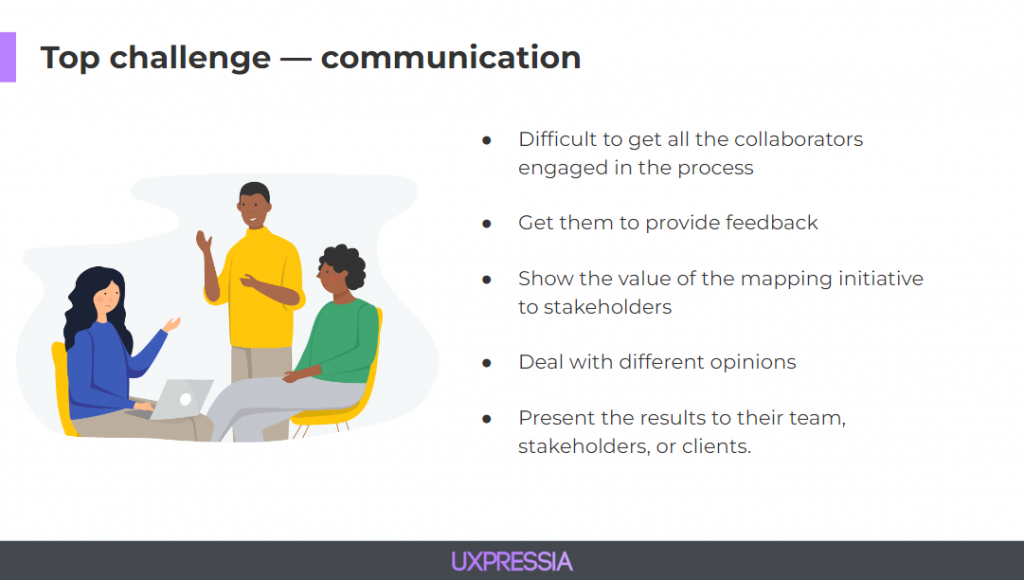
- 40% of people struggled with communication.
- 26% of the clients had challenges with the methodology: understanding the customer, analyzing possible scenarios of their journey, and determining the sequence of steps.
- 18% of users dealt with technical aspects as not all people were familiar with the tool used for journey mapping.
- 16% of respondents said their main issue was not knowing where to start.
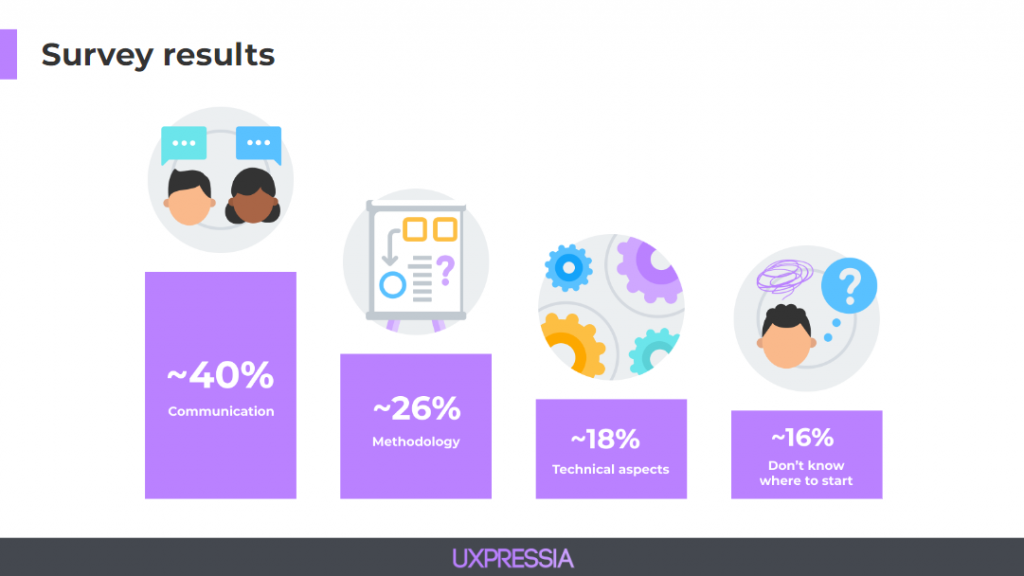
As you can see, communication presents the biggest challenge. People mentioned it’s difficult to get all the collaborators engaged in the process, get them to provide honest feedback, show the value of the whole thing to stakeholders, deal with different opinions, etc.
Today, we’ll focus on the initial part of each collaboration — planning. We'll share some practical tips to consider at the very beginning so that you can properly set up all the processes.
The importance of being strategic
Every project starts with planning it out. And the more strategic you are about it, the better results you get. And by being strategic, we mean knowing where you want to get with the mapping and envisioning the entire process, not just the immediate next steps.
So try to think ahead and picture all the steps you will be going through or whose help you might require along the way. But don't forget: the circumstances might change, and strategy must adjust accordingly — and that’s Okay!
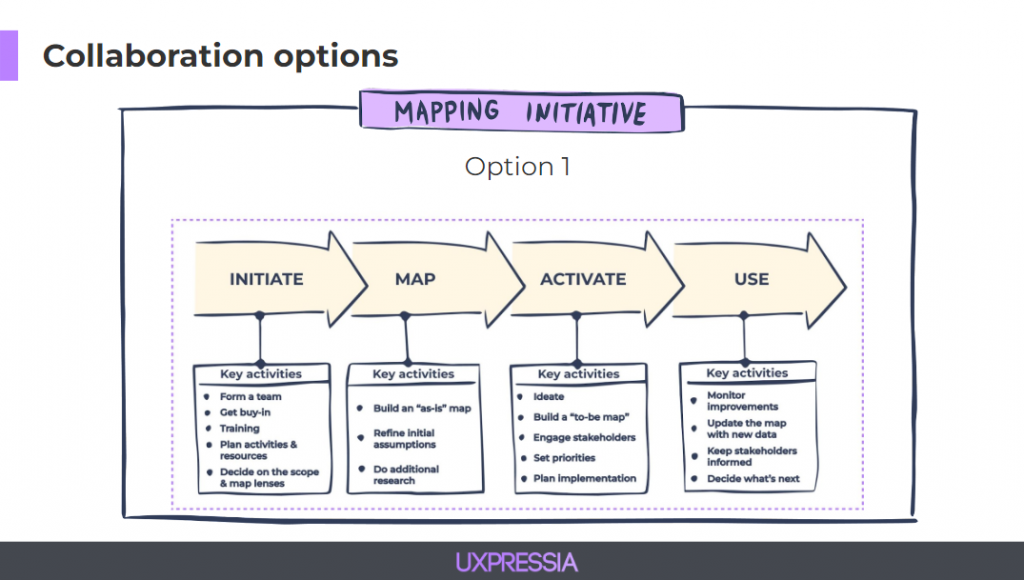
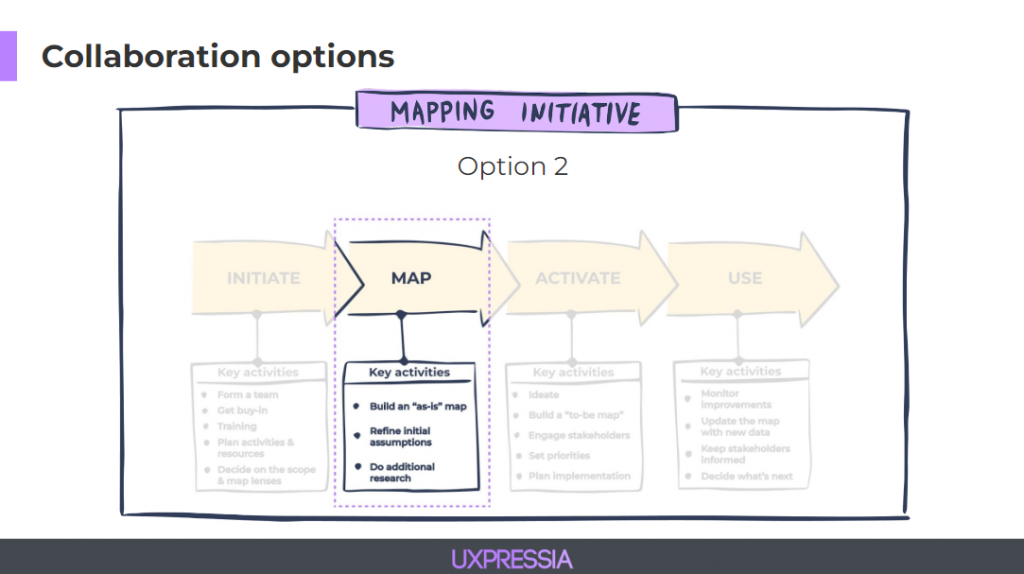
4 stages of journey mapping initiatives
There are many ways to approach your mapping initiative, and here is a visualization of our suggested process.
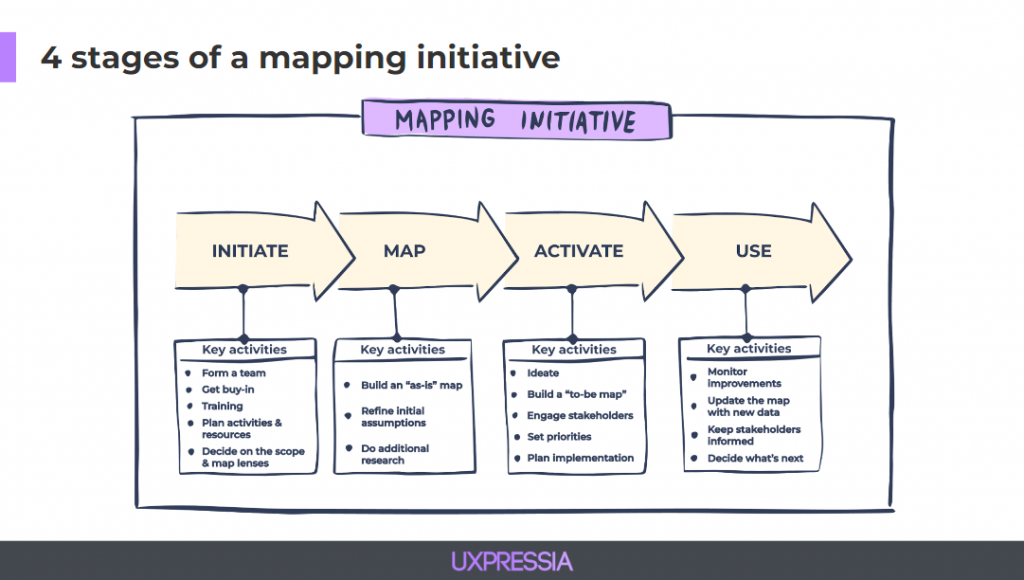
- Initiate: here we define our goals, identify success criteria, and plan the whole thing.
- Mapping: here we build the map itself and refine the assumptions we made at the previous stage.
- Activate: this is where the action is born. We engage stakeholders and plan out the implementation, making this initiative alive. Here's where some people stop.
- But there's one more stage — USE— that is often forgotten after the map is built and ideas are captured. From talking to clients, we know that most people believe it's very important, but few actually get to it.
By the end, you might be lacking resources or have competing priorities that interfere with putting the initiative to use. This is why it’s so essential to plan all the steps ahead because the feeling of commitment increases the chances of getting things done.
Also keep in mind, that what you want to happen in the Map, Activate, and Use stages influences how you approach the first one — Initiate.
Before you start, be sure to answer 3 key questions.
3 types of journey mapping initiatives
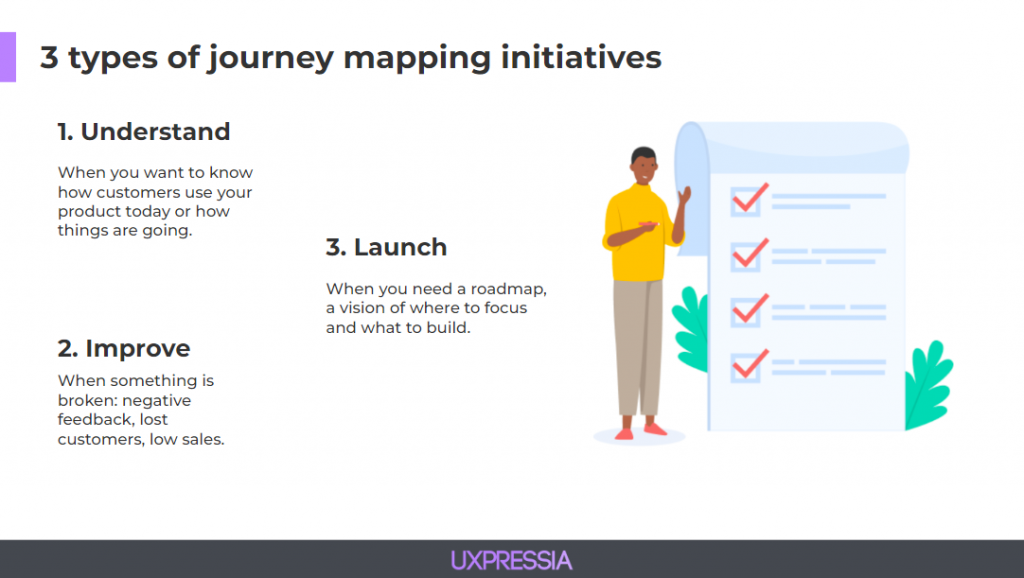
The first question is “What?”: What is the end goal of the mapping initiative? Depending on the goal, you might need to focus on different aspects of the map.
We talked to many mappers and found that most maps fall into one of three categories: Understand, Improve, and Launch.
To put everyone on the same page, define the initiative’s goal before proceeding to other steps.
UXPressia tip #1: Setting up the scene
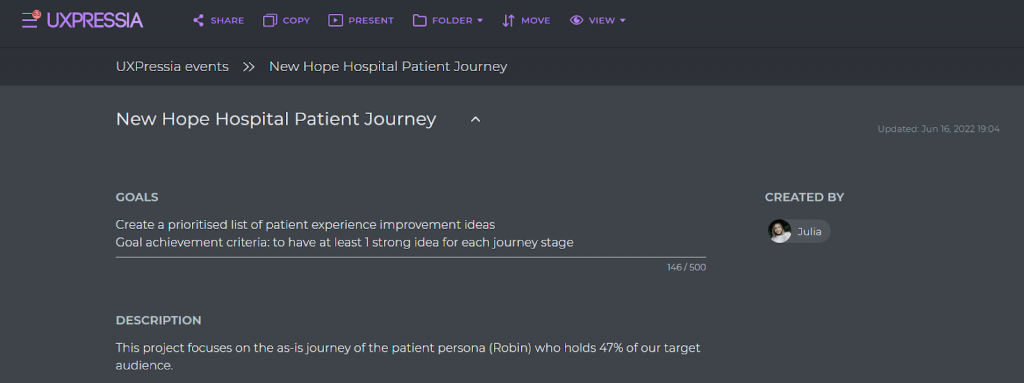
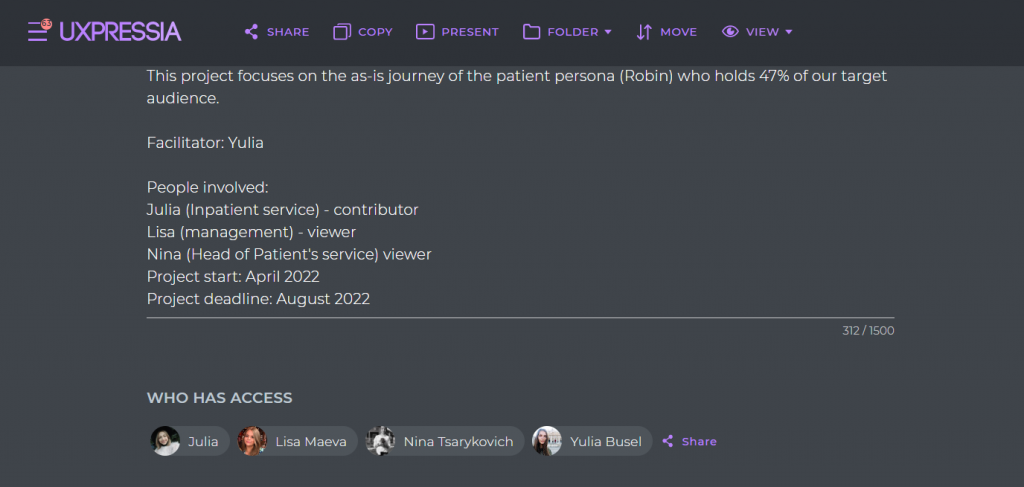
Imagine that we want to improve the patients' journey at a hospital. We’ve already created a new project in UXPressia. Now, we need to set up the scene so that everyone who joins us at any time will have a clear picture and be on the same page.
On the project page, you can add its description and write down your goals as well as goal achievement criteria.
UXPressia tip #2: Managing maps
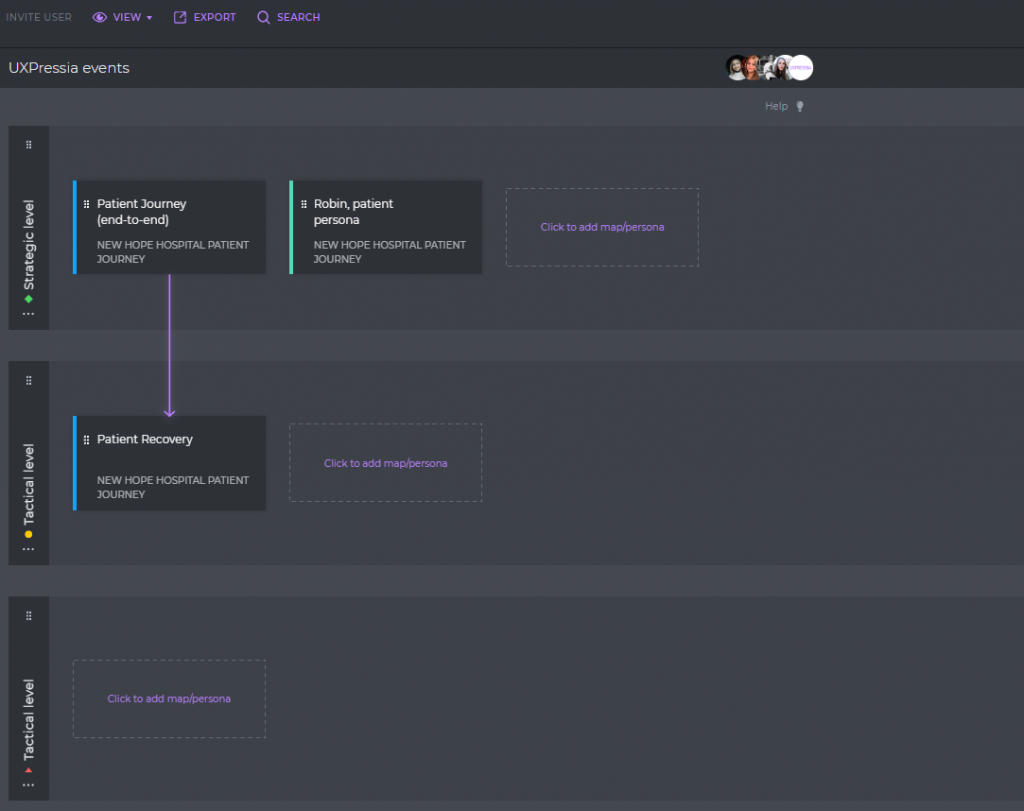
Depending on the improvement you are aiming for, your map can be either strategic or operational. At UXPressia, you can build both types, and the Design View functionality is handy in this case.
For example, we created one high-level strategic map with all the stages our customers go through. And we also mapped out one of them in a more detailed way. Switching to the Design View, you will see how the documents are connected. The higher the map is, the more abstract it is. You can visualize the connections with arrows.
Mapping lenses
Another thing you need to decide on is the scope. Are you mapping an end-to-end journey or some part of it? In today's case, we’re exploring an end-to-end journey.
Then you would need to pick a map type: depending on your goal, you need to decide whether you want to build an “as-is” journey, a “to-be journey”, or maybe both.
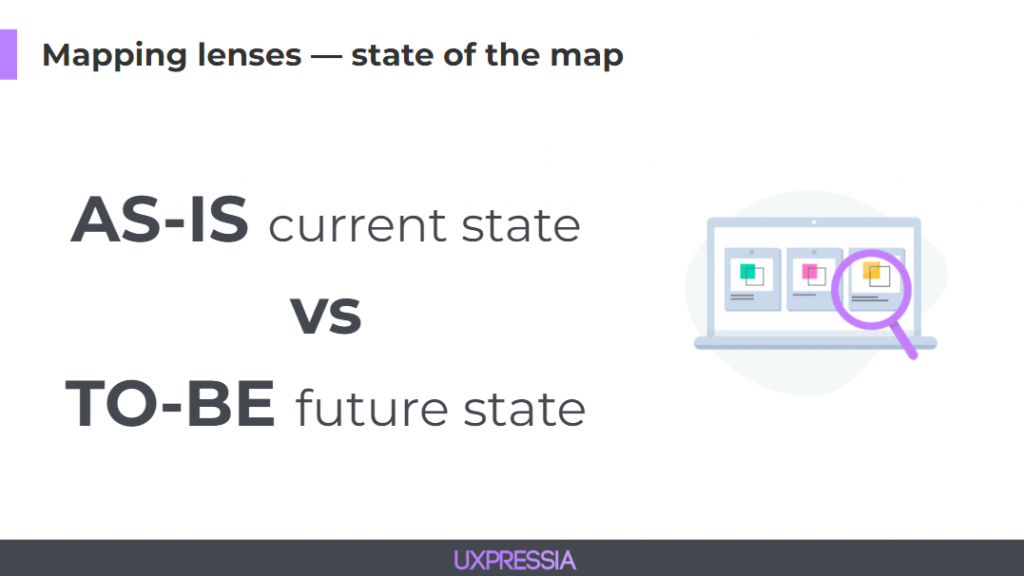
As-is shows the current state of the map, while a to-be map is aimed for the future state, an ideal or, at least, enhanced version of the journey.
What you want to visualize on the map also affects your collaboration process.
- Do you want to show the journey from the customer’s perspective? Go for a customer journey map.
- Want to add business processes along the way? Go for a service blueprint.
You can build a skeleton of a map, make it full of details, or add interactions. It all depends on your goals.
Who to involve in the collaboration?
The second question is “Who?”: Who to involve in the collaboration?
Collaboration means working in a team. And no matter whether it’s your internal team or your client’s, it’s crucial to understand what you need from different people who will be joining your team. You might want them to share their feedback, contribute in some way, implement ideas, or simply just be in the loop. But what’s also important is to let them know about your expectations.
Collaborating on journey mapping can be overwhelming. And even more so if you dive into the map you’re seeing for the first time.
Think of it this way: even when you theoretically could build the map with a smaller team, engaging more people will help you later on.
Not only can they bring something to the teamwork, but also without getting them familiar with the process, it will be extremely challenging for them to understand it later.
And this brings us to the roles.
Approaches to discussing roles
So who should work on the journey map?
There are different approaches to discussing roles. One of the very popular and helpful ones is the RACI matrix.
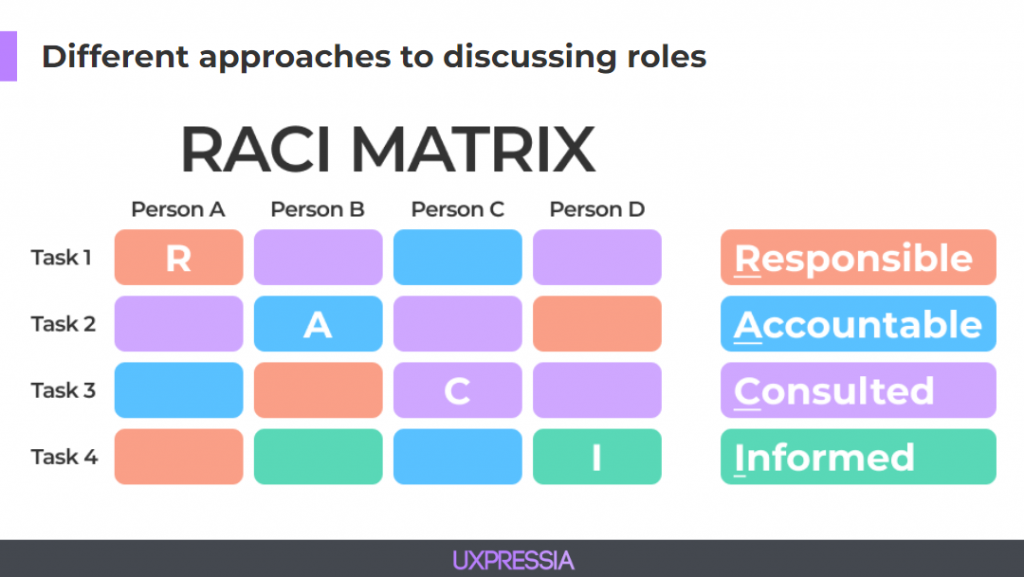
If you don’t want to spend too much time getting into it, use an alternative approach based on the roles.
Depending on your goals and map type, you need to decide which teams/stakeholders to involve. E.g., marketing, sales, CS, dev, etc. These can be all team members or just team representatives.
Here’s how we like to look at the roles:
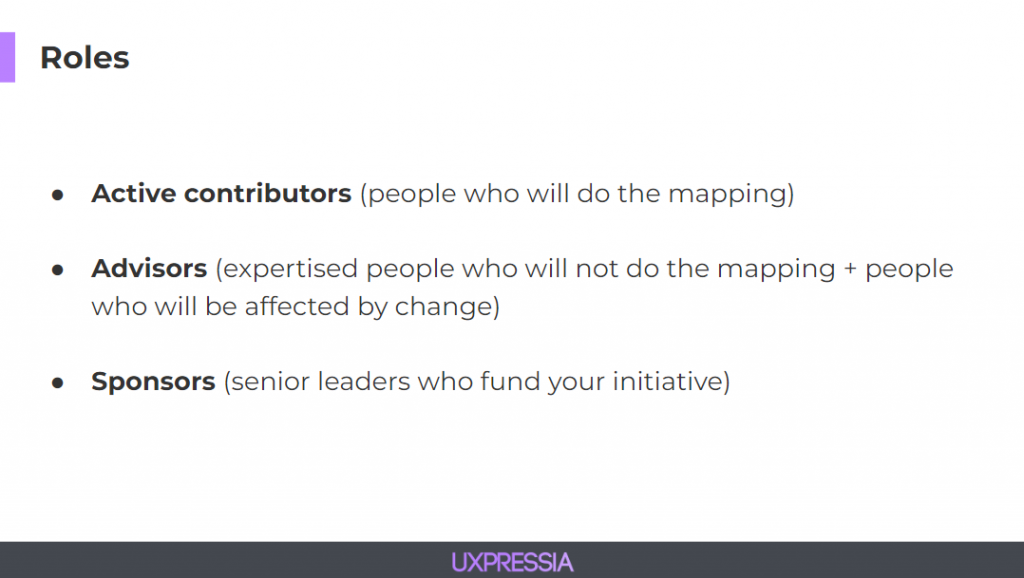
As you can see, not all of them need to edit the map itself, so it makes sense to assign different roles to them in the tool you use to build your map.
UXPressia tip #3: Assigning roles
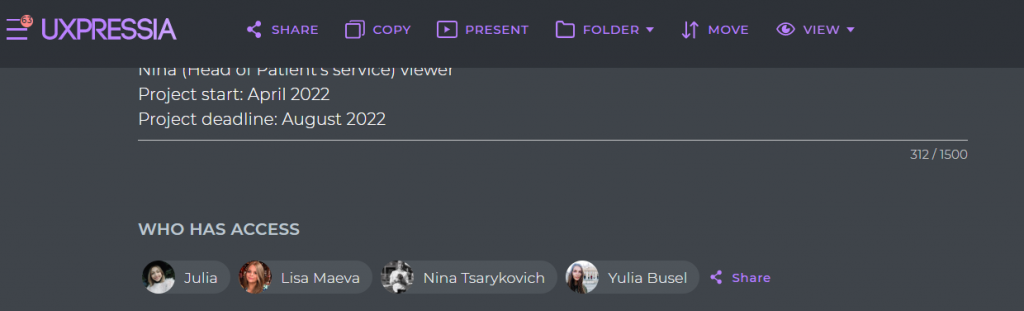
On the project page, you see the team of 4 people, where Lisa and Nina are managers who will view the map content and leave comments, while Yulia is a facilitator of the whole process and she needs to be able to collaborate on the map with other people, make edits, and create maps and personas.
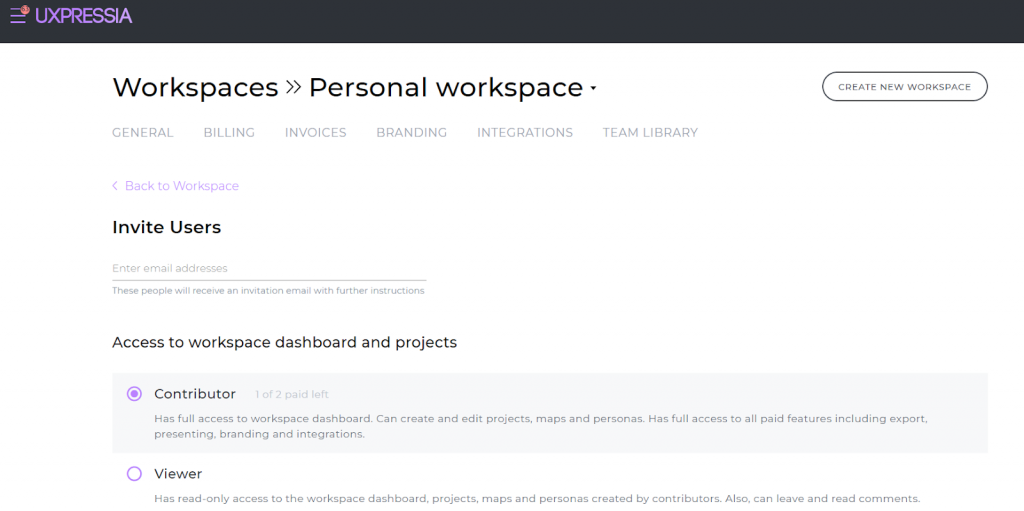
When granting people access to the project, it makes sense to assign appropriate roles for these workspace members and make active contributors workspace Contributors, and the rest — Viewers.
It’s also a good idea to specify the roles in the description so that everyone with access to it can see them.
UXPressia tip #4: Sharing
Instead of giving your teammates access to the workspace, you can share only the project they are involved in.
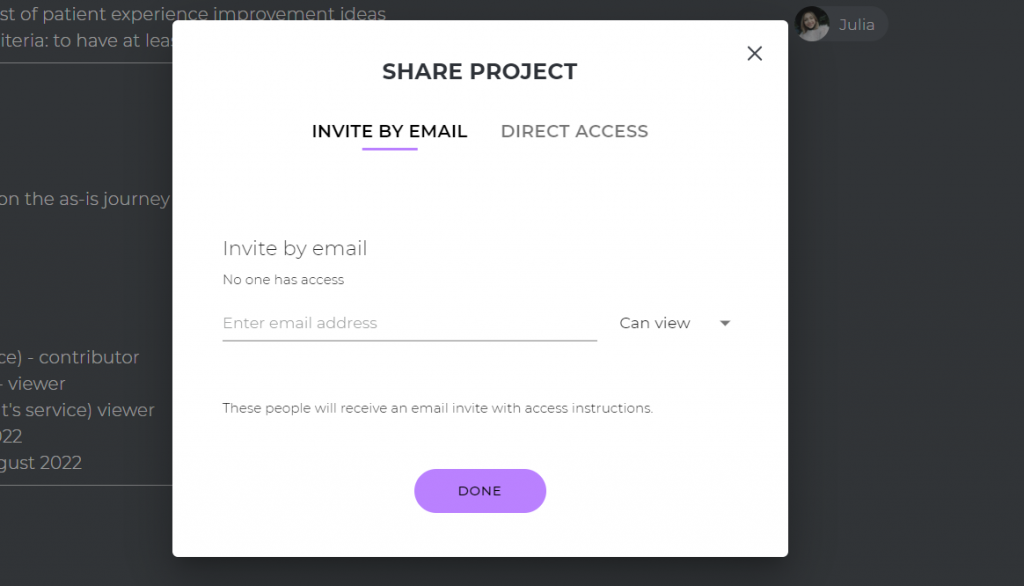
- Use link sharing if you don’t want your teammates to create an account;
- Use email sharing to encourage them to sign up.
UXPressia tip #5: Receiving all work notifications in one place
If you want your collaborators to be instantly notified about mentions and changes in the map, ask them to connect their corporate Slack or MS Teams account with the UXPressia platform.
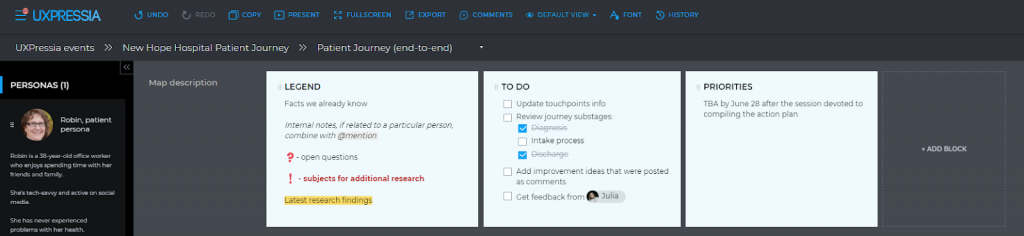
UXPressia tip #6: Adding a map description
You can add some basic information (e.g., guidelines on how to fill in or read the map) to the map description section to give your team more context about the document.
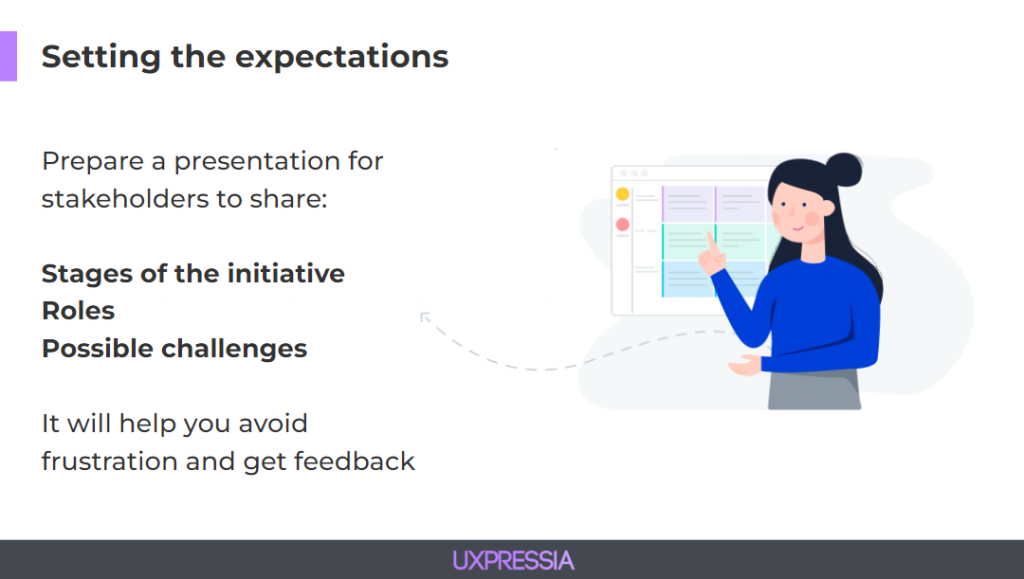
Setting the expectations
It’s important to define goals and expectations: who contributes what and who expects what. It’s a common issue that some stakeholders expect you to bring a plan for their approval, while you actually want some input from them.
So be sure to set the right expectations and maybe even have them written in the project description.
You can share some slides with stakeholders and describe the planned phases, what you are going to do and how you are going to do that. Also, assign user roles and, if relevant, talk about possible challenges to avoid frustration and maybe even get feedback from them.
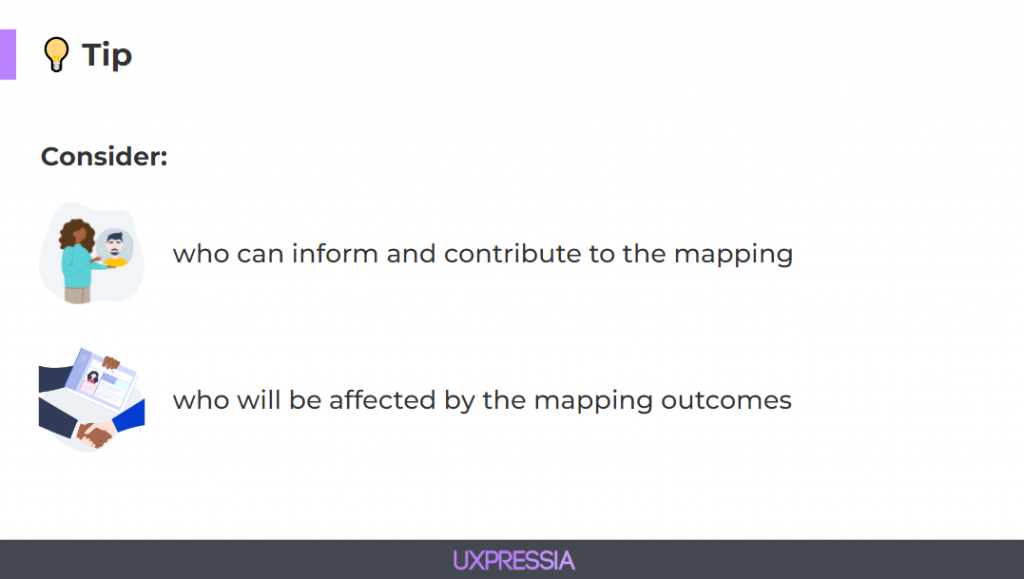
You need to consider who can inform and contribute to the mapping project and who will be affected by the outcomes, as these are not always the people who will need to edit the map.
Collaboration timeline
The third question is “How?”: How do we organize the collaboration process?
The first thing you have to do is set up a timeline. It is crucial to understand how much time it takes to map a journey and what you can or cannot afford to get others on (or off) board.
Lacking time and being in a rush kills collaboration. Sometimes when you take too much time in the beginning, you have to rush everyone towards the end, which creates deadline pressure and shatters creativity. So clarify with the team and stakeholders whether your initiative has hard or soft deadlines.
Also, spend quality time discussing other time limitations that might affect the project’s progress, like upcoming vacations, competing priorities, etc.
If this is your first time, overestimate how much time each phase can take.
Some questions might help with that:
- Where is my team right now?
- How well do they know mapping as a technique?
- How close are my goals as a leader to them?
If you have a highly motivated team, you can play around. If not really, you will need to choose which part of the process would be the most beneficial for collaboration.
Let's look at the stages we mentioned earlier to give you an example.
You can collaborate on all of them together with the team or work together only on the mapping stage.
Or if you already have a finished journey map and want to engage stakeholders and create a strategy upon it, your collaboration will focus on Activate and Use stages.

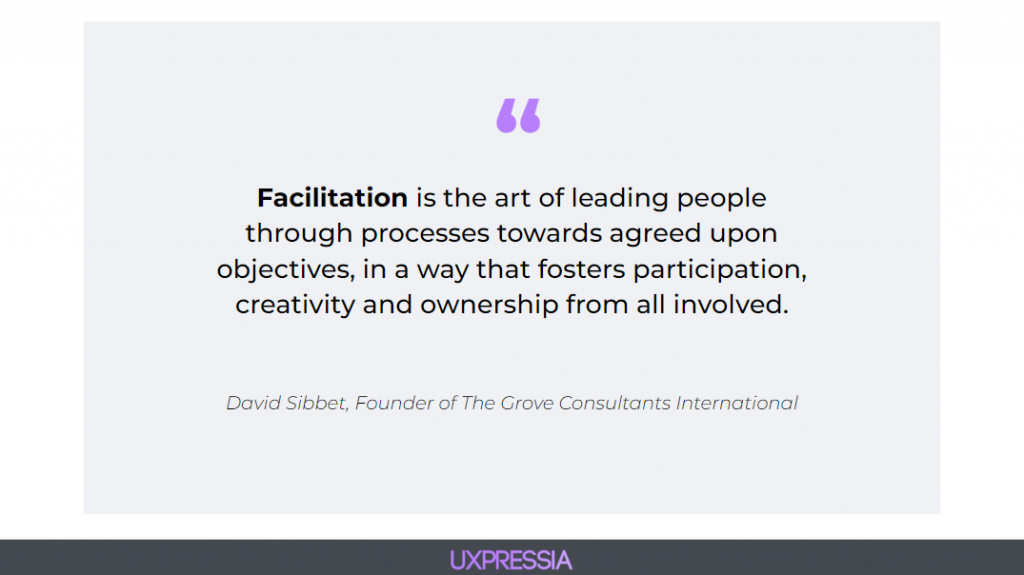
The importance of facilitation: who should play this role
To make it all work, collaboration on journey mapping needs to be facilitated.
Facilitation is not the same thing as management; it means literally easing things for the teamwork.
You might ask who will play this facilitator role. It can be:
- an assigned role;
- a rotation (in some cases).
Usually, the person in charge of the initiative assigns the facilitator and decides on the phases that need to be done together. Oftentimes, the person in charge is the facilitator themselves, but it can get a little tricky as they need to distinguish the times they’re playing the managing role and the role of a facilitator.
Managing and facilitating are two separate things, and the person in charge must be careful with every ‘hat’ they put on.
UXPressia tip #7: Write collaboration rules
As a facilitator, add another block to the map description section and write collaboration rules so everyone who opens up the map can read them.

UXPressia tip #8: Introduce custom tooltips
Add some instructions or general information to each swim lane by leveraging custom tooltips.
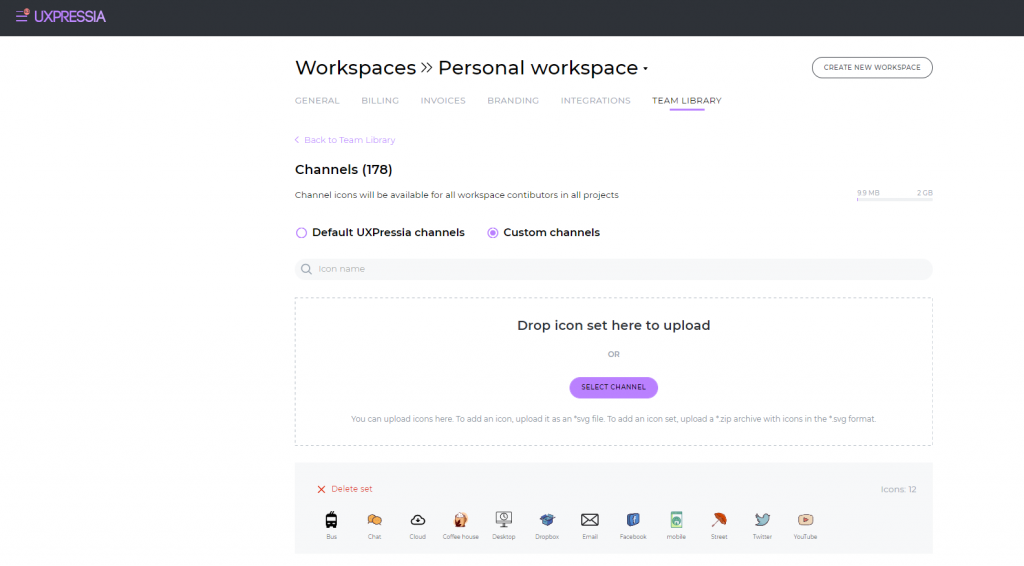
UXPressia tip #9: Create a library for your team
To achieve consistency in naming, colors, images, icons, and other components to be used by your teammates across their mapping projects, add those to the Team Library, which is available to all workspace contributors.
To sum up
We hope that now you have a better understanding of journey mapping collaboration basics, including goals, roles, and responsibilities. We also hope that our collaborative customer journey mapping examples will come in handy when it comes to your own initiative.
Bonus: Journey mapping collaboration basics's recording
Sometimes it’s better to see than to read. So feel free to enjoy the event recording (with the Q&A part included).
What’s next?
The next event on journey mapping collaboration basics is coming soon. So stay tuned! 😉