We are starting this month with some hot new features, some of which you have been asking us for.
Map/Persona description
We’ve introduced a new Description section to our customer journey maps, personas, and impact maps.
This section is a special place to store general information about your map or persona. Use it to add some context and align your team vision. See our ideas below to get inspired:
- Describe a high-level scenario applicable to the entire customer journey to set the correct scope for your mapping.
- Include context, such as jobs-to-be-done, the customer’s desired outcomes when the job is completed, and the relevant use cases.
- Add general information about the map/persona: who is responsible for what, known milestones and important dates, links to research data or designs.
- Write down a legend explaining what the colors\icons you used mean.
Adding the section works as simple as that:
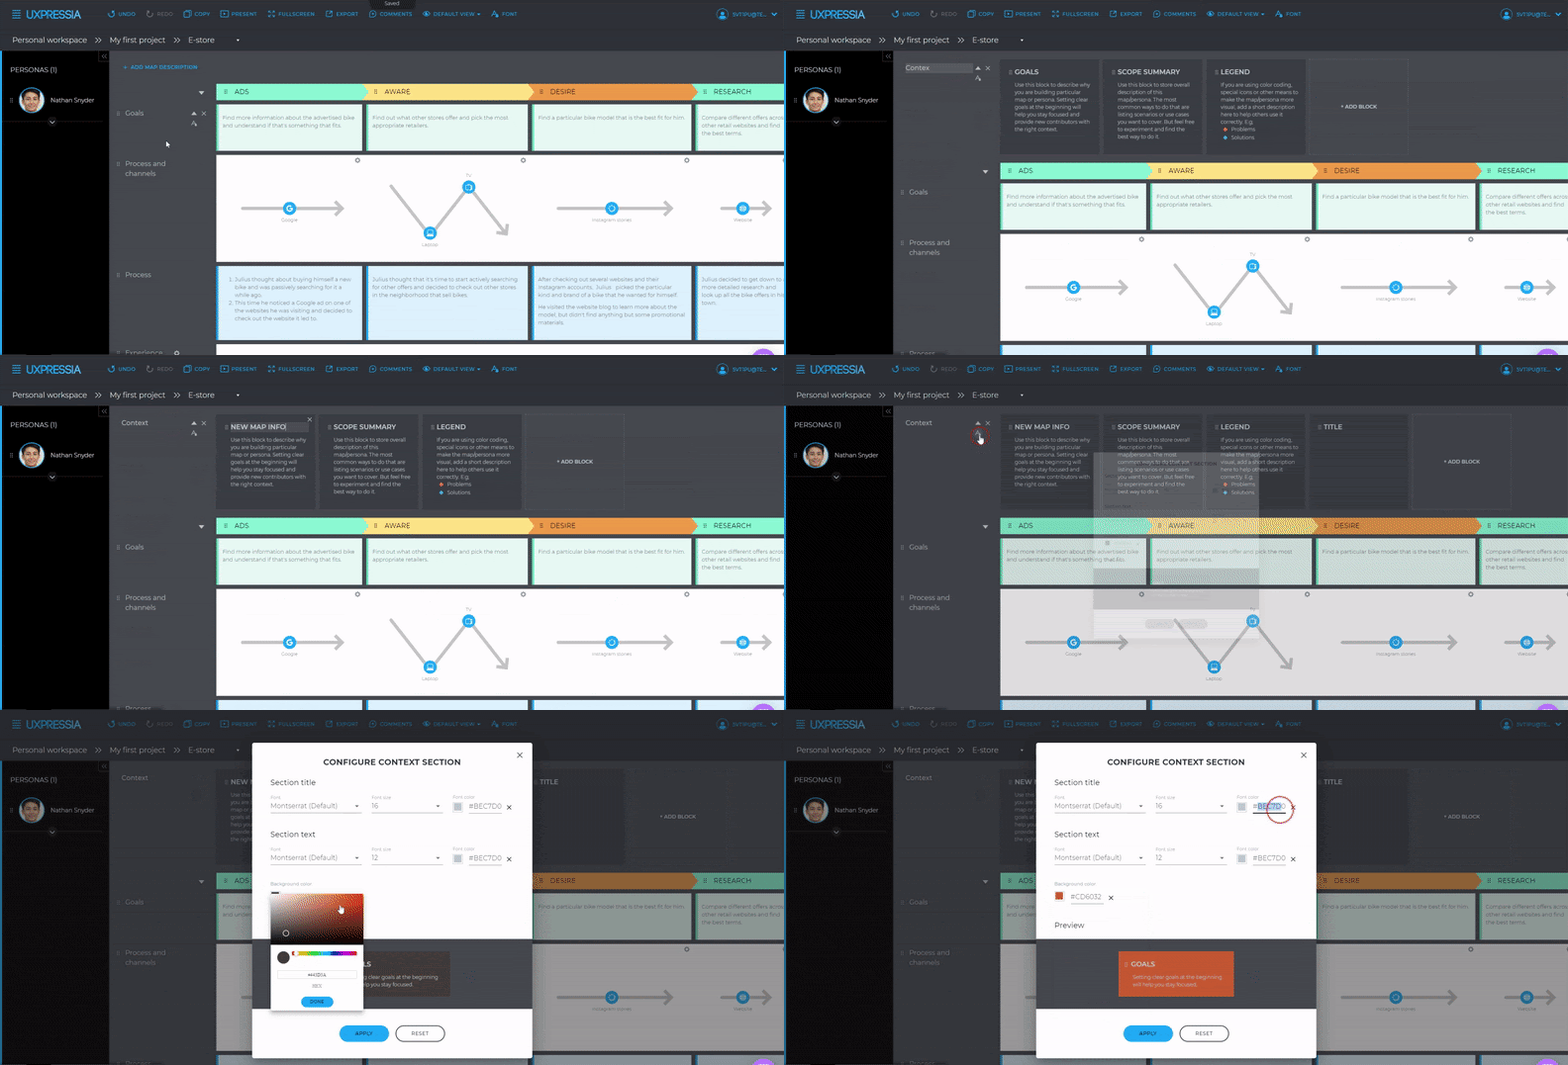
You can remove and add new blocks, rename and customize them.
Note: If you are going to export the map or persona and don’t want to display the Context section in the exported file, be sure to collapse it before exporting.
Bonus 1: Collapse and expand journey map sections
Now you can collapse (and expand) sections in your journey maps and even export your maps without the hidden sections.
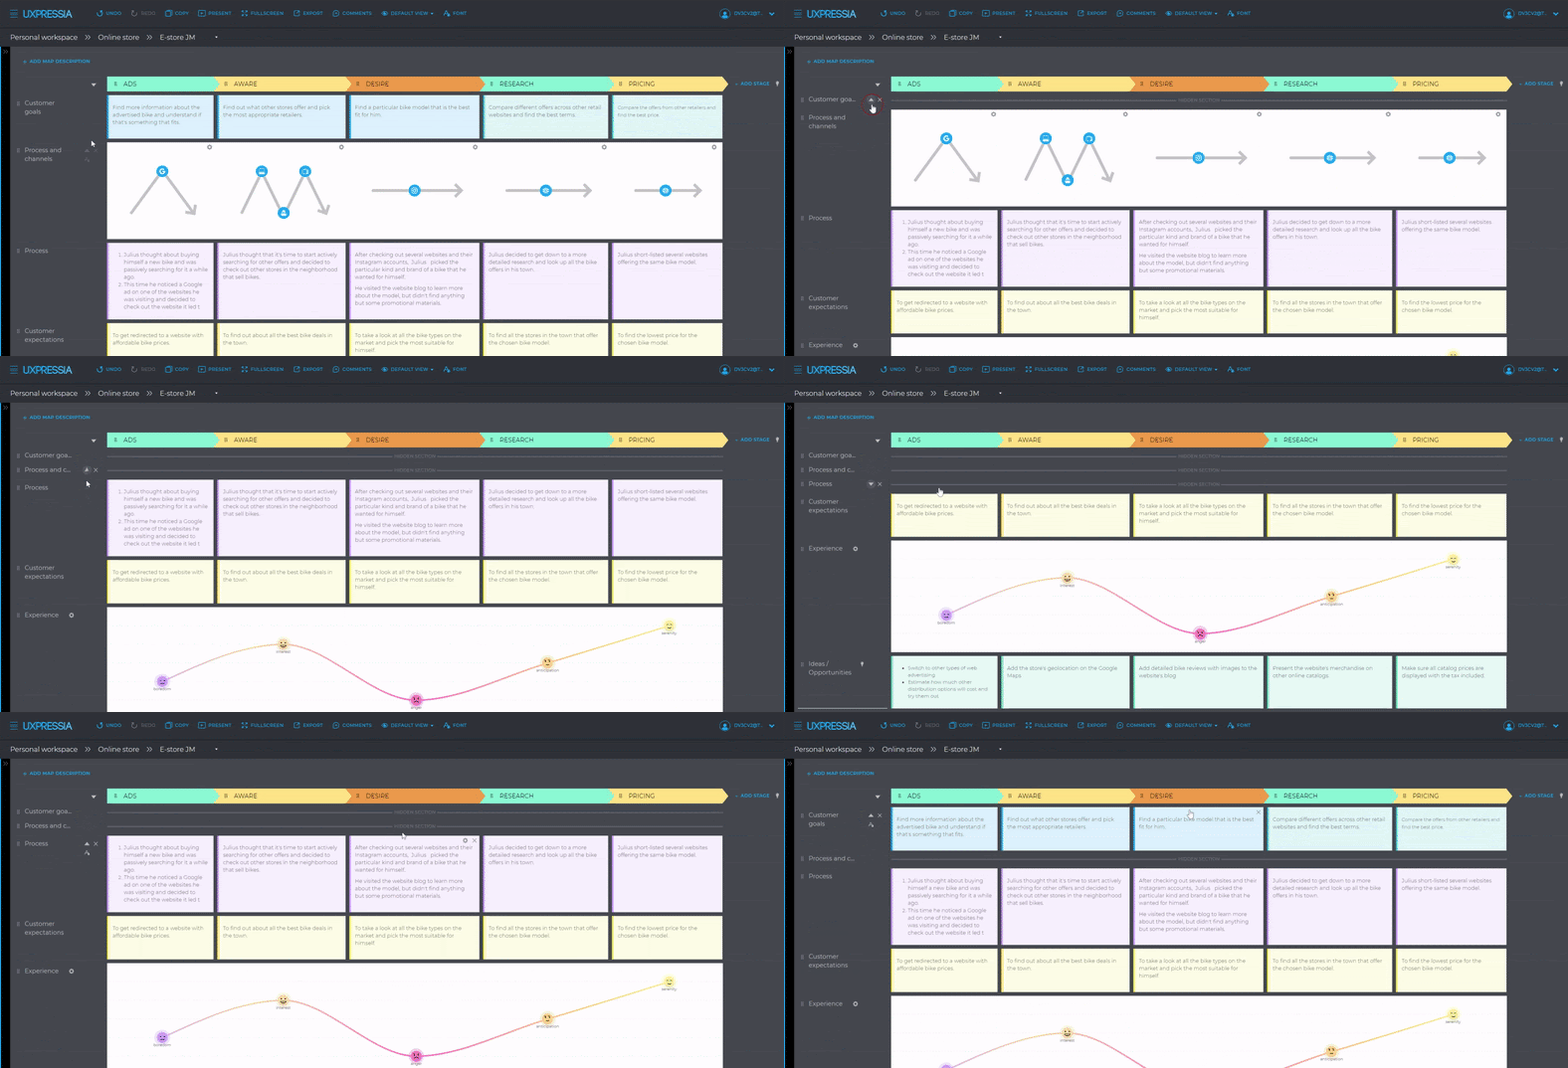
To export your map with some sections hidden, instead of creating a separate View for this purpose, you can simply collapse these sections.
Bonus 2: New features in the Personas tool
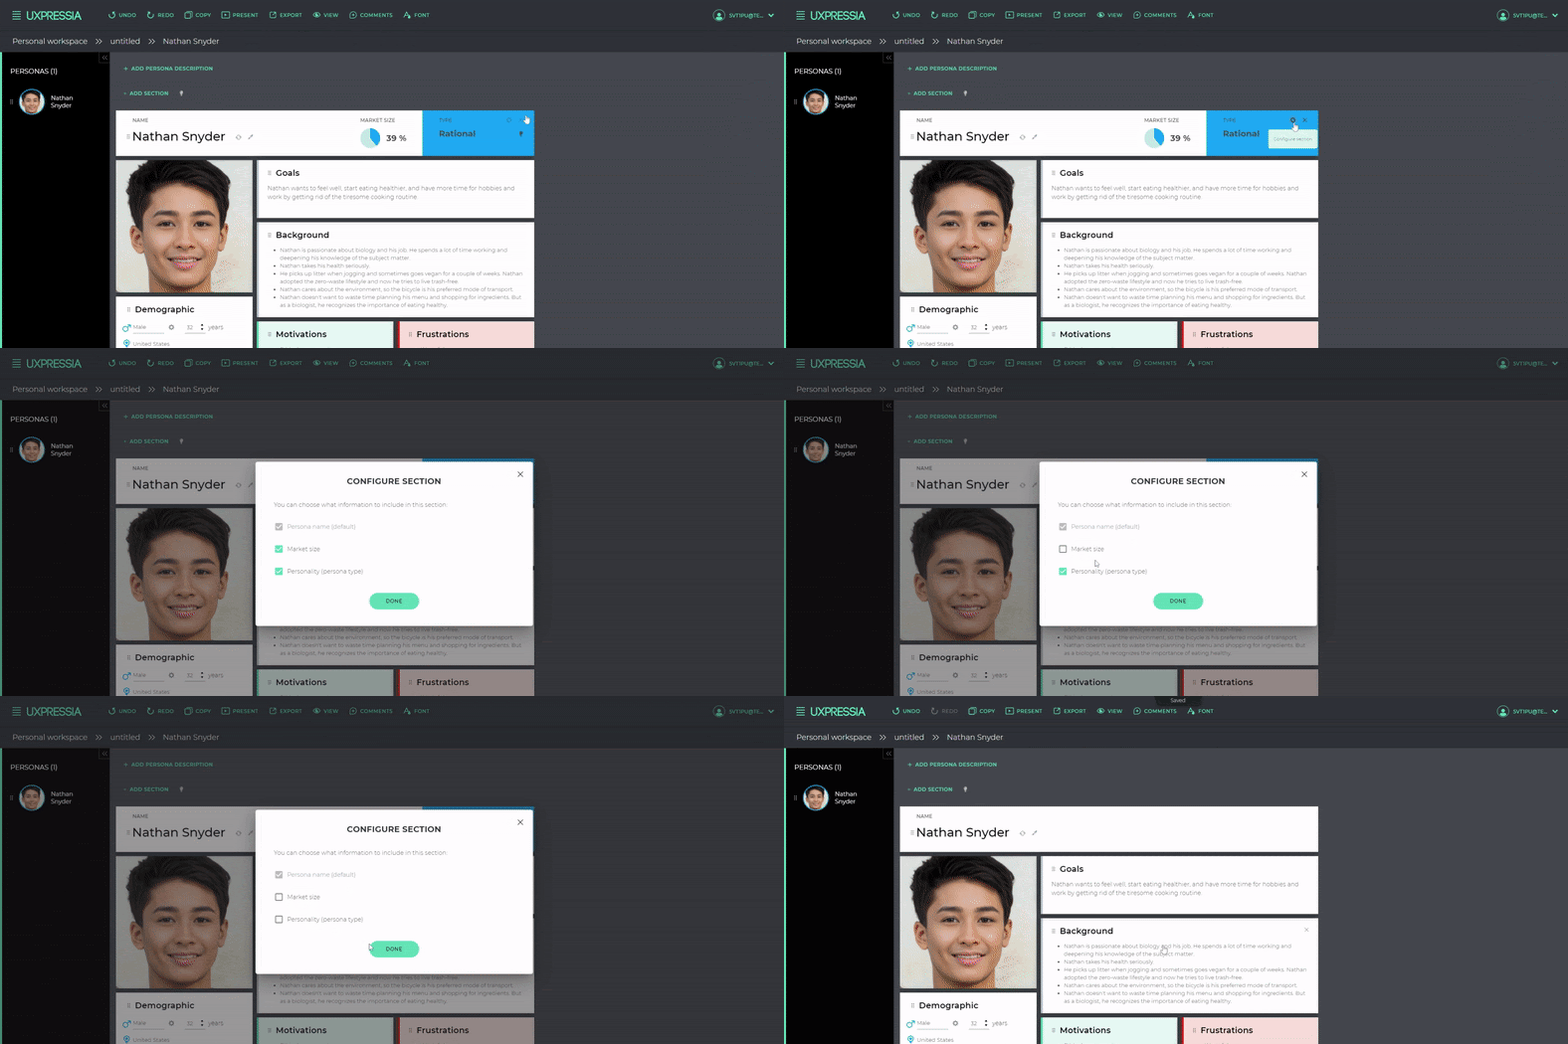
The Persona name section got an upgrade: from now on, you can pick which parts of it you would like to include. You can switch Market size and/or Personality off if you are not using them in your Persona.
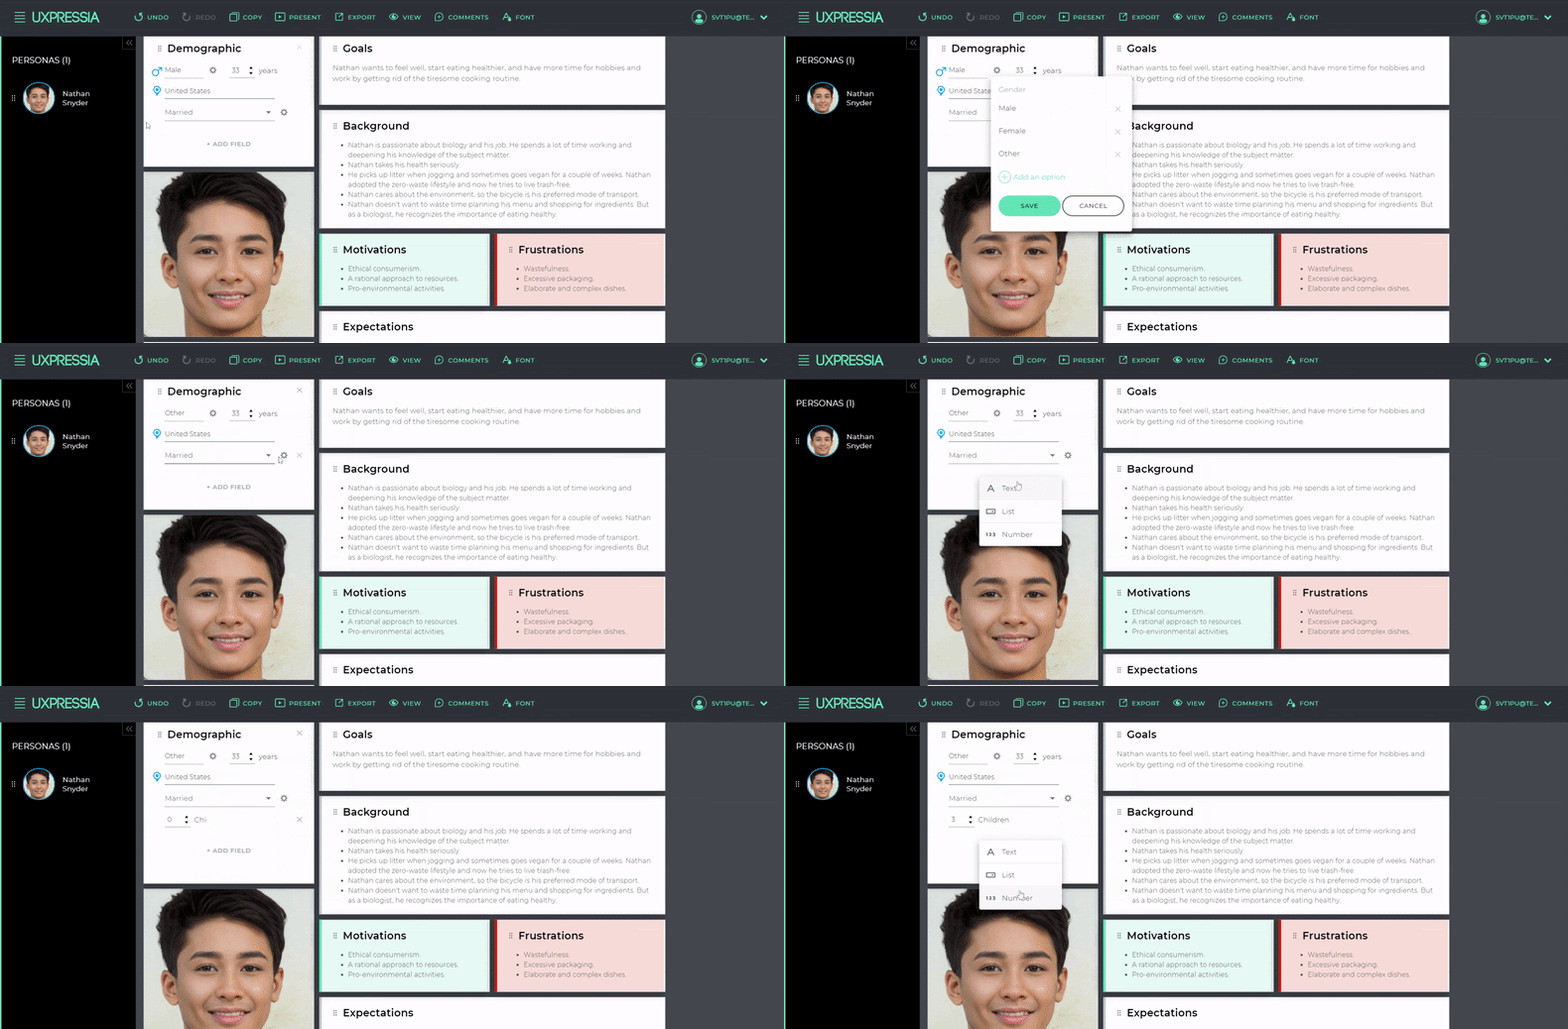
Some other updates are also available in the Demographics section:
- You can configure all defaults in the dropdown menus, add custom names (e.g., in Spanish or Russian), and rename labels.
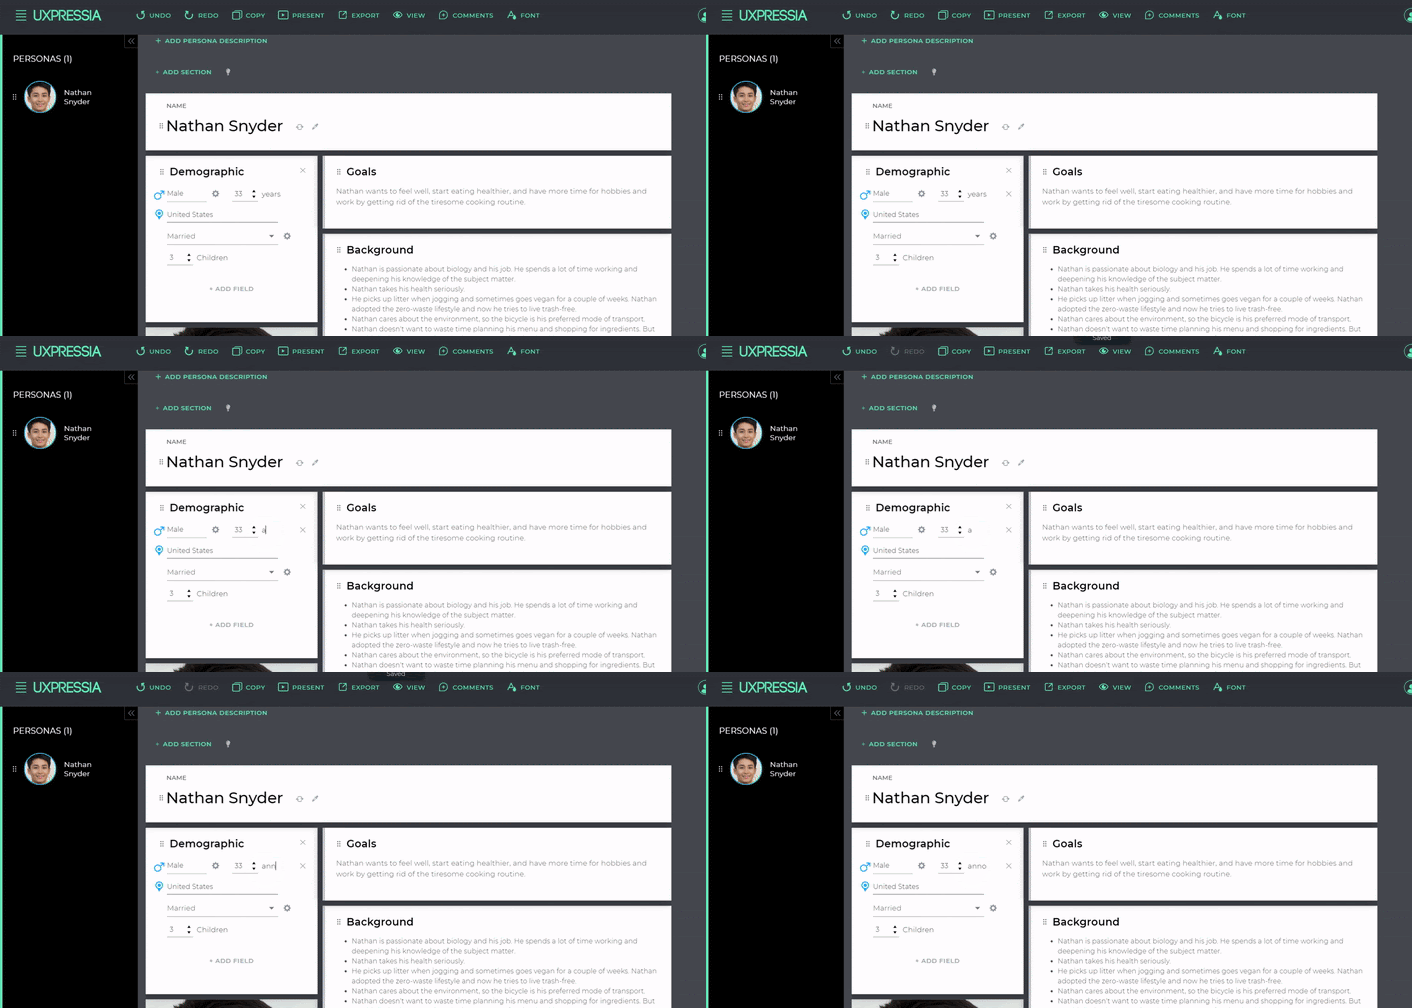
- You can add more values to the gender/marital status fields.
- You can add custom fields of the different types, such as text, list, and numbers.
Ready to try out the new features?


